

Using a “Drop Box” with your students
What is a drop box?
“Drop Boxes” are directories or folders on a server that
can be used by your students to “drop” off a copy of
their file to you for grading. Students cannot see the contents of
the folder, they can only “drop” their files onto the
teacher “drop box” folder. As the teacher, you have the
rights to open and view the contents of the folder, and trash files
that are no longer needed. If anyone obtains your login name and
password, they would have the same access to this folder.
Teacher dropbox directories also include a "Handouts" folder which is a "read-only" folder that can be used for students to pick up a file, such a template you wish students to work from.
Why use a drop box?
The student projects are getting larger in size, and may present a problem when
attaching to an email message. Dropping the files to a shared server can help
prevent the email server (and your "Inbox") from getting overloaded. The teacher dropbox "setup" also includes a Handouts
Folder for providing assignments or documents that students can "pick up."
How do I get a drop box?
Drop box folders are set up by the Network team (please enter a request via the helpdesk). Please allow
at least a full week’s notice for your request.
Please pay attention to these 3 simple guidelines for the best results when working with Drop Boxes:
1. THE DROP BOX IS FOR SHORT
TERM STORAGE ONLY.
Once a student drops a file off to you, you need to "pick it up." This means you need to copy it to your hard drive and then delete the original
in the drop box.
2. DO NOT OPEN A FILE WHILE
IT'S IN YOUR DROP BOX.
As a general rule, files should NEVER be opened from within a
server folder. It only takes a moment to drag a file to your desktop to see
what it is. (and with the "QuickLook" feature of the Leopard OS, you can press the space bar to view a preview of any selected file). Presentations should NEVER be "run" or "presented" from within
the dropbox foler. Always drag the file to your computer's desktop first!
3. ORGANIZE FILES ON "YOUR" COMPUTER
Once the file has been copied to your hard drive, you can create
folders and sort or arrange the files by class period. DO NOT create
additional folders in your Drop Box. If you do, files have been known
to become damaged when moved to a sub-folder. Once files are organized on your desktop,
it's easy to back up student work on a CD-Rom and file it for future
reference.


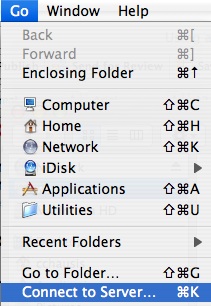
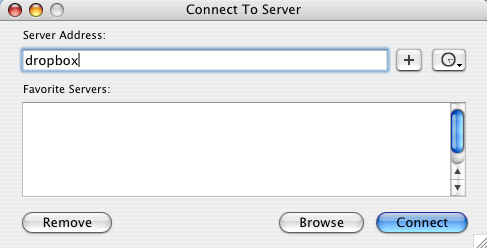
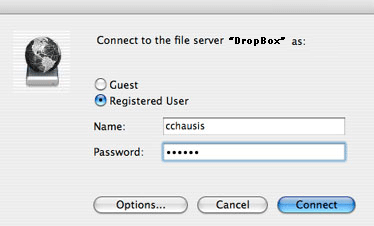
Students use the same Steps #1 and #2 above to establish a connection to the Dropbox server. PLEASE NOTE: all students will now login using the username student, and a password of dropbox.
How do students copy a file to my drop
box?
Students will locate and open the teacher folder (eg. sdiver, nhudson, pfairchild, etc.) and drag a file onto your "Dropbox" folder icon. Students will see an alert message stating “You do not
have permission to see the result of this operation. Do you want to continue? ” and they
must click OK for the file to be copied into your
folder.

>THIS
IS REALLY IMPORTANT!
Each student must use a unique name for their document. Using
their name or their ID number works well. If students have files with the same title, dropping a
duplicate file will result in a warning that another file exists and
students will not be able to drop off their file. TIP-- Ask your students to name their files as the class period and their last name. (Ex. "1-Chausis.ppt") -- it will be easier for you to manage all of the files!
What do I and my students do when finished
with the drop box?
Similar to ejecting a disk or USB drive, you and your students must “dismount” the server by dragging the "Dropbox" icon to
the trash. Remember, this does not trash or delete files.
How long do the files stay in the drop
box?
As the owner of the dropbox folder, you are responsible for deleting
the old and out-of-date files. Please do not use the dropbox for
long term storage of student files. (Refer to the guidelines
at the beginning of this tutorial).
Charlene
Chausis,
Technology
Training & Integration
Adlai E. Stevenson High
School