Working with Graphics
in AppleWorks 6 Word Processing
Adding Graphics to your Word Processing files:
From the File menu, you can select “Show
clippings” to view clipart, and also be able search for
thousands more on the web. Graphics from the clippings are simply
“dragged” into the document. The caveat is to learn the
difference between and "in-line" graphic (one that behaves as
if it were a character in your document and moves along with the
other characters) and a "floating" graphic (one that can be dragged
to any position on the page).
The flamingo to the right is an example of an in-line  graphic. If you add characters to the sentence above, the flamingo
will move along the line.

|

|
To create a floating graphic, you must
first "activate" your graphic arrow pointer in the toolbar.
(To show your toolbar, click the red toolbox at the bottom
of the document window, or from the "Window -> Show
Tools" menu.) Again, you drag the graphic onto the page,
but notice that it floats over the text, as the dragonfly is
floating above this paragraph.
With the graphic selected (handles or
nodes are visible around the graphic), you can choose other
features, such as the "Options -> Text Wrap" to
wrap text away from a floating graphic, as it does with the
toolbar graphic to the left.
|
Images other than those in the Clippings palette can be "inserted"
into your documents using the "File -> Insert" menu. Two
things to remember here are: 1) be sure you activate your graphic
arrow if you want the graphic to float over the text, and 2) on the
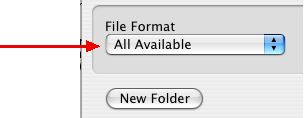
“Insert” dialog box, choose “All
available” from the drop down menu so that jpgs and gifs are
recognized by AppleWorks.

 graphic. If you add characters to the sentence above, the flamingo
will move along the line.

