STEP-BY-STEP
Setting up your ArchiCAD plans for Artlantis rendering
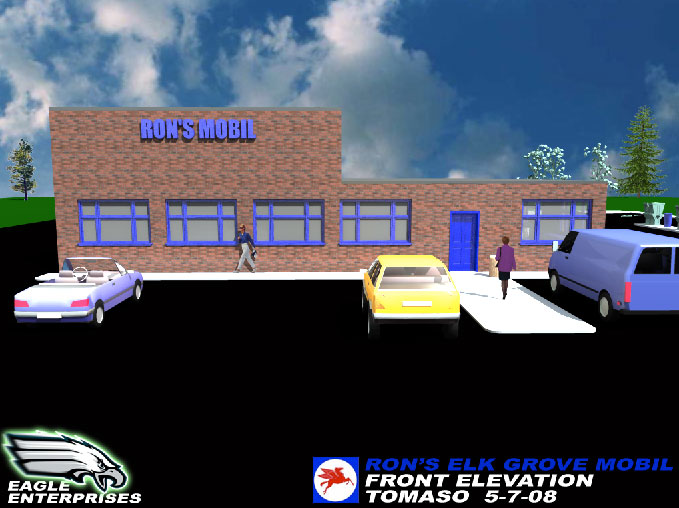
SAMPLE: Rendered Front Elevatrion
Ron's Elk Grove Mobil - 2008
|
STEP 1
To complete the Artlantis rendering, you must FIRST prepare your ArchiCAD plans for rendering. Follow this short list of layers to hide or reveal 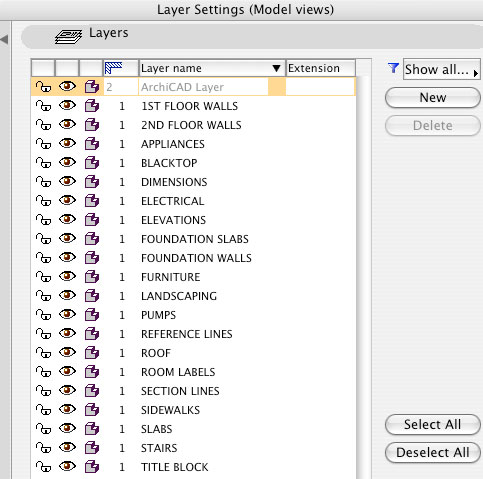 |
HIDE THE FOLLOWING: • Dimensions • Trusses, Beams, & Columns • Foundation Details • Interior Details (if not seen through front windows) REVEAL THE FOLLOWING: • Landscaping • Parking Lots & Vehicles • Exterior Lights • Sidewalks and walkways • Exterior furniture and accessories |
|
STEP 2
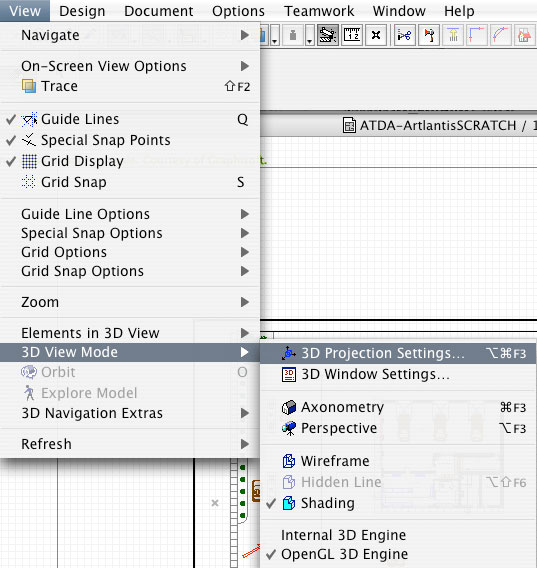 |
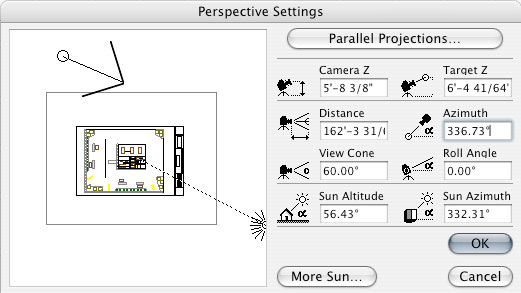
Prepare a 3D PERSPECTIVE using ArchiCAD. Go to the View pull down menu, select the 3D View Mode and choose 3D Projection Settings from the last list. You must create a PERSPECTIVE VIEW, Artlantis will not accept a Parallel Projection. |
|
NOTE: It is much faster to create a view that looks away from your building - ArchiCAD isn't forced to render the perspective for the screen
|
 |
|
STEP 3
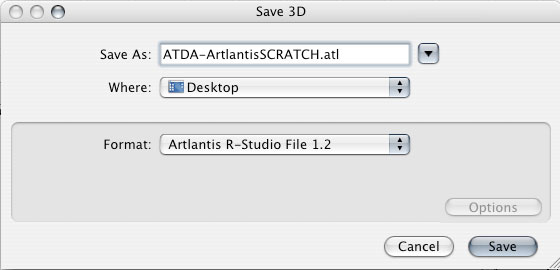 |
Once ArchiCAD has finished creating the 3D view, you must save the file from the 3D window.
Save the file as an Artlantis R-Studio File 1.2. Place it on your desktop for easy access.  |
|
STEP 4
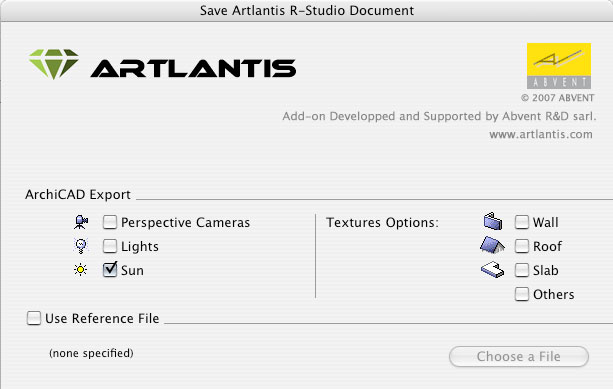 |
Artlantis will prompt you to choose export options. TURN OFF all the options EXCEPT for the SUN. When finished, EXPORT the file to your desktop. When you have completed these steps, go on to Part II - USING ARTLANTIS |
[Updated: